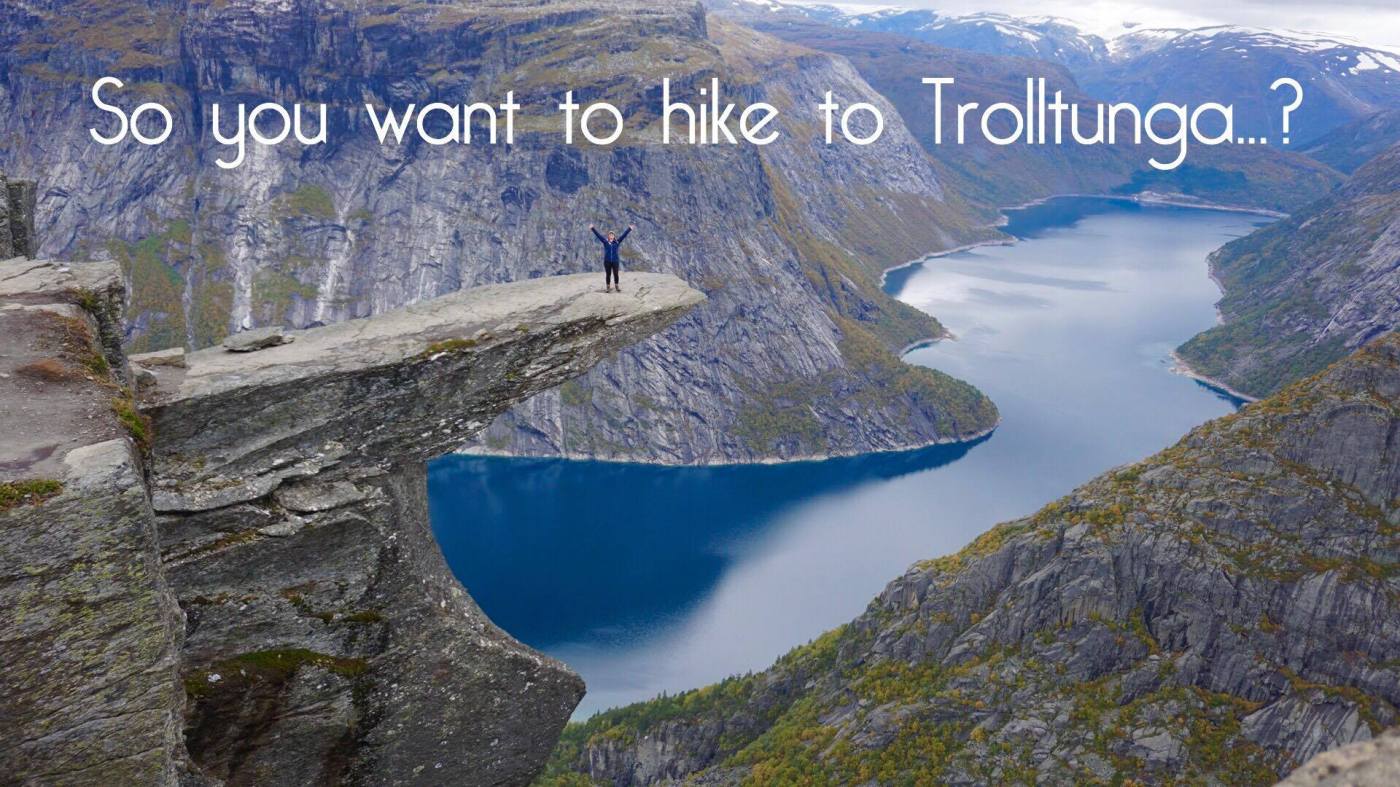

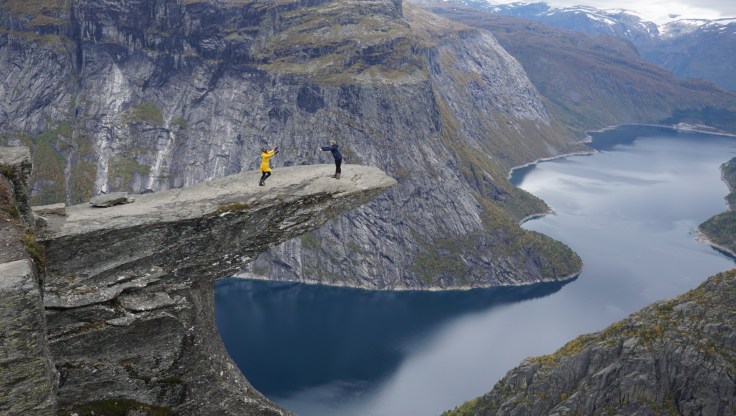
Have you seen this photo? Perhaps you have seen it a million times on Pinterest, Instagram or Facebook. This is Trolltunga, an absolutely breathtaking rock that juts out of a cliff side about 2,300 feet over lake Ringedalsvatnet (lets all admit that you just tried to pronounce that very slowly and then blurted out some butchered version of it) outside of Odda, Norway. Before the year 2010, only about 800 people would hike to this spot each year, but now with social media showing people these dazzling photos of this surreal place, about 80,000 people hike it every year. This took the small town of Odda by surprise. Our Airbnb host told us that the entire town just wasn’t ready for this amount of people, and if you ever go you’ll find Odda to be a small, quaint Norwegian town with only about 2 real restaurants (so far). So book your lodging in advance during high season!

If you want a fun helicopter ride, try to hike this unprepared…
Unfortunately, many people don’t fully research how to get to Trolltunga. They see a neat picture on Instagram and scream “I WANNA GO THERE” and then they go absolutely unprepared. This hike is not easy. This hike will take all day. This hike is extremely strenuous. And if you’re not prepared for it there is a chance the only way you’re getting home is by a rescue helicopter. Norwegian rescue teams seem frustrated by the amount of people that attempt to hike to Trolltunga unprepared, and the amount of rescues this year has doubled compared to past years.
For example…
Hiking back from Trolltunga when we were about 3 km to the parking lot when we ran into a girl dragging behind her group. Her makeup was perfect and she was wearing an Instagram-worthy outfit, clearly all ready for her triumphant photo on the troll’s tongue. She was keeled over a rock and clearly was desperate for her day to be over when she whimpered to us, “are we almost there?” it slightly broke my heart and I responded as gently as I could with, “Oh honey, no. Not even close”. She had about 8 more hours of hiking in front of her. And the sun was about to set.
I know everyone is desperate for that Instagram photo… but please please please do your research first.

What are the facts?
-Hiking to Trolltunga takes your average person about 10-12 hours
-The hike is about 14 miles roundtrip
-There is a LOT of incline. Be prepared for your knees to hurt on the way down and your heart to hurt on the way up.
-If you can’t park in the magical parking spot (which I will discuss later) be prepared for MORE incline.
-There will be a queue of people at the rock waiting for their photo to be taken. This queue can be anywhere from 1 minute to 4 hours depending on the season.
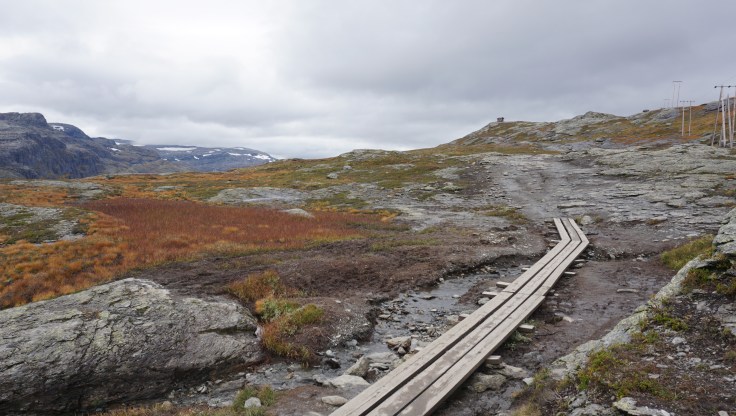
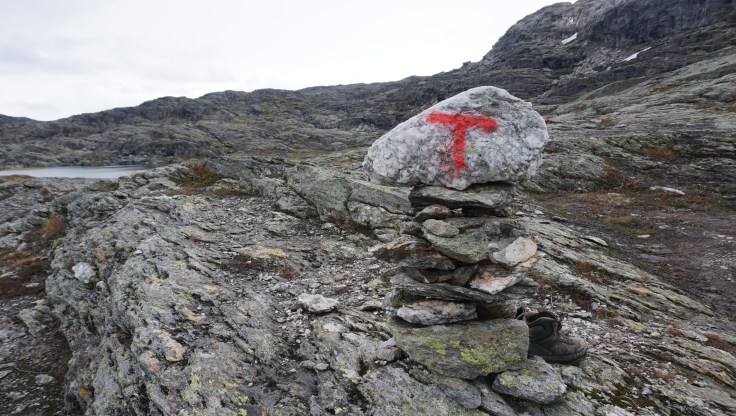
-The trail is well marked with red T’s along the way.
-You CANNOT hike to Trolltunga from October 16th – March 18th, because you will die.
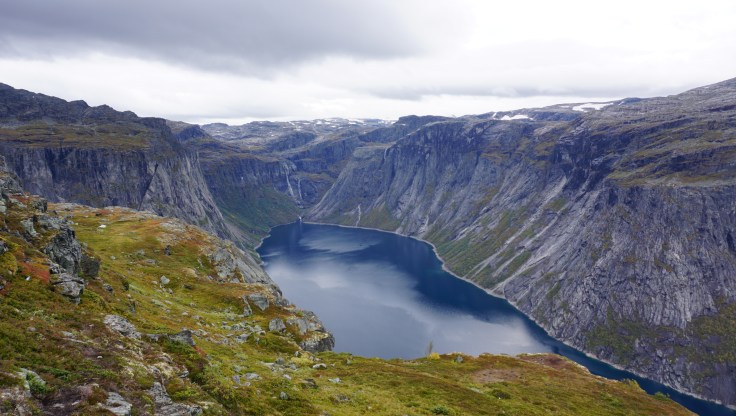
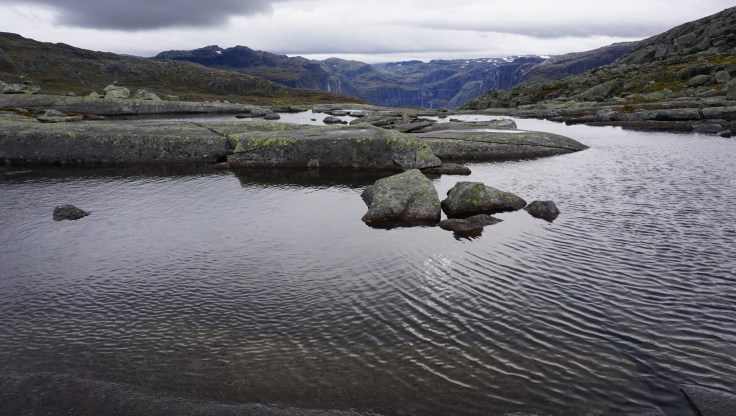
-You’ll have to think real hard about hiking during the times of March 19th – June 15th and September 15th – October 15th. The weather is unpredictable up in the mountains, so there is a chance that you’ll get caught in a snow storm or get hypothermia during these times. We hiked it on September 22nd and the weather was cold, but there was no snow and maybe 150 people along the trail (which is nothing for this hike). The queue for photos was basically non-existent, and we all went out on the tongue about 3 times.
-The recommended time to hike it for the best weather is June 15th – September 15th, but also keep in mind that during the high season, you can wait in a queue for up to 4 hours to get your photo taken on Trolltunga.
So you still want to hike it?
And you should!! I totally encourage prepared people to take this hike. It has been on my bucket list for years and it was ABSOLUTELY 100% worth it.
But let me give you some tips on how you can prepare for this hike so you aren’t carried away by a helicopter…
1.) Dress Appropriately
The most important part of your hiking outfit is going to be your shoes. I always hike in my Keen Elsa Boots, because I have been all over the world in these boots and I know they are good for my feet. They are also water proof on the bottom half of the boot, and the trail to Trolltunga can get VERY muddy. Do not go out and buy a brand new pair of boots and give them a try for the first time while hiking to Trolltunga. Make sure you trust your shoes, and you know how they make your feet feel before this hike.
Wear LAYERS! I was freezing cold and boiling hot while hiking this long hike. I wore 4 upper layers and 2 lower layers and peeled off layers as I warmed up. A hat and gloves are a must to bring along just incase.
2.) Get an early start
The earlier you start, the more likely that you’ll have the trail to yourself and a shorter wait in the queue for your photo. Also, don’t rush the hike. Some people want to see how fast they can hike it so they can brag, but the scenery along the way is amazing, and its a shame to rush your way through it.
3.) Bring snacks and a water bottle
Snacks are a must along the way. You’re going to get tired and you’ll need some energy. Also, there are fresh streams of glacier water along the hike, so you can fill up your water bottle along the way. This water was some of the best water I have ever tasted (right next to Icelandic water straight from a waterfall). Remember to stay hydrated! Even if you are cold, you still need to be drinking water along the way. Your body will thank you.
4.) Bring a garbage bag
The amount of trash on the trail made me really sad. Bring a garbage bag with you in your backpack, and make sure you carry out your own trash, and pick up trash off the trail while you’re hiking (yes, even if its not YOUR trash).

5.) Park in the magical parking lot
Now this parking lot is a new thing. The first kilometer of the hike is apparently absolutely horrible, so someone built a parking lot that enables hikers to bypass that horrible part. There are only 50 parking spots, and they technically open at 7:00 am, but I advise you to get there before that if you’re hiking in the high season. Parking also costs about $65 USD, but this will be the best $65 you have ever spent and you will be kissing the parking attendant’s face when you’re done with your hike.
The parking lot is easy to find, just head left when you get to the lower parking lot and it’ll take you high up the mountain side and into the newest carpark. There are signs to help lead you there.
They only currently accept card, no cash. So make sure you bring one!

6.) Make sure your photo is perfect before you leave
This kind of hike is most likely going to be a once in a lifetime opportunity. If you never plan on going back, make sure you get enough photos and that you’re happy with them. There are a couple angles that you can get of the tongue, so encourage your photographer (AKA random stranger you hand your camera to) to try all of the angles.
7.) Research and Train
If you are new to hiking, start hiking locally in your area. I use the app AllTrails for local hiking spots (it even gives directions to trailheads, which is what I used to get to the Trolltunga trailhead). It would be advisable to hit the gym and start climbing the stair stepper.
Check out websites like this Norwegian Trekking Association site that will help you understand how to plan for a hike in Norway.
And make sure to check out their page on Fjellvettreglene, which is Norwegian Mountain Code .
So please, be safe and prepared before setting out to do this hike.
But also have fun 🙂
